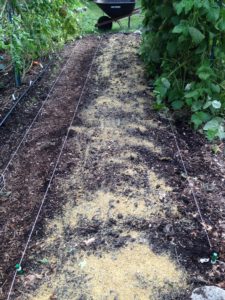
After clearing the bed, add lime (if necessary) and some slow-release nitrogen.
Garlic is one of the greatest crops to grow because it requires so little effort, and the results are delicious.
Don’t be frightened by the number of bullet items below – the whole process takes me 45 minutes, including planting 160 garlic.
- Clear bed of all debris, fallen leaves, etc.
- Spread layer of fertilizer. (In my case I only need nitrogen, I use soy or alfalfa meal.)
- Add lime, if necessary. (In the northeast it is necessary.)
- Spread 1″-3″ of compost. Use the back of a bow rake to spread the bed flat.
- Allow to sit a few days while squirrels and raccoons dig in it. Better now than after you’ve planted.
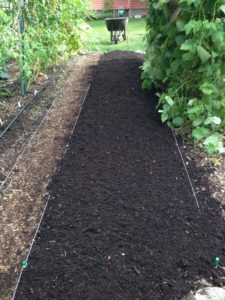
Spread some compost on top, use a bow rake to make it flat, and wait a day or two before planting. This allows squirrels to disturb the area, and you to repair it, first.
- Repair bed from squirrel/raccoon damage as necessary and plant bulbs 2″-3″ deep (two knuckles deep, for me), pointy end up, spaced every 5″-7″, depending upon what size garlic you want and space available.
- Cover with hay or, preferably, shredded leaves.
- Do nothing until June 2017, unless you want to.
If you DO want to do more, then here are some simple other things to do:
-Water, regularly or as needed,
-Add some nitrogen, but not more than twice and
not too close to harvest time,
-Take photos.